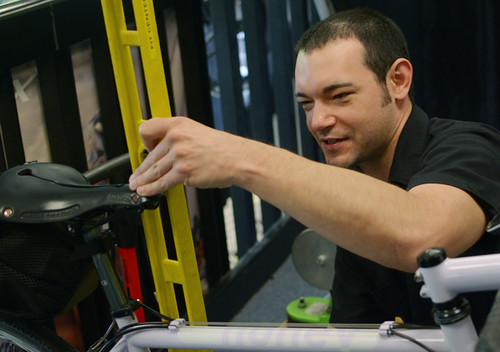
Earlier this week I was visiting Cycle Loft - a local bicycle shop known, among other things, for its extensive fit studio.I will be test riding a few of their bikes this summer, and the staff suggested I undergo a fitting session beforehand. As we were getting started, the fitter - Joel - caught sight of the Selle Anatomica I was riding. He asked whether I wanted to use my own saddle, given how particular it was, or try something new.
Today there are lots of high quality, well thought-out saddle designs on the market, in a variety of materials. The trick is to find one that fits our particular anatomy, position and riding style. For the past two years I've been going back and forth between a Berthoud touring saddle and a Selle Anatomica on my roadbikes. These saddles are as close as I've been able to get to being truly comfortable over long distances. But neither is perfect. SoI decided to keep an open mind and see what the fitter recommended.
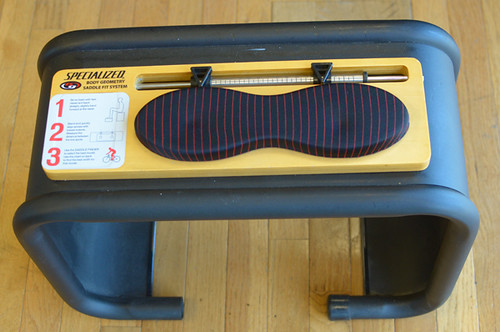
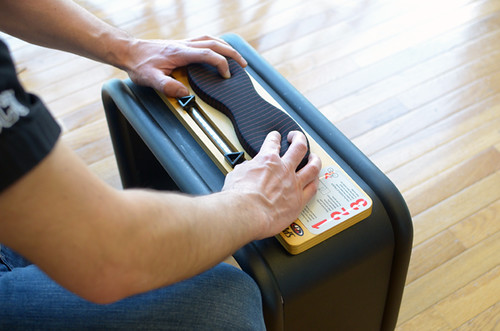
To start with, Joel measured my sit bones. This is something I've never had done "professionally" before, so it was pretty exciting. Cycle Loft uses the Specialized "Body Fit" method, which, as I understand it, is comparatively un-intrusive (no pelvic fondling, etc.). But there is a nifty device involved. A stool was brought out with a butt-shaped pillow, upon which I sat as instructed. When I stood up, my sit bones left two clear indentations, which Joel swiftly measured.
The figure was 135mm - considerably narrower than what I thought my sit bone width was based on my DIY measurements (the figure I'd come up with was more like 150mm). But we repeated the process just to make sure and got the same number again - so looks like 135mm it is.
Joel explained that a saddle should be wider than the sit bone width itself. How much wider depends partly on the rider's position and partly on the saddle's shape. As far as the rider's position, the more leaned forward you are, the narrower area of support is needed. That much I'd known. As far as saddle shape, Joel showed me a selection or road/racing saddles and pointed out that on some the sitting surface was flat across, while on others it was rounded, like an arc. For all my careful scrutiny of saddle shapes, this was not a distinction I'd explicitly been aware of before, so I was excited to learn something new. For any given rider, on a rounded saddle the width needs to be greater than on a flat saddle.
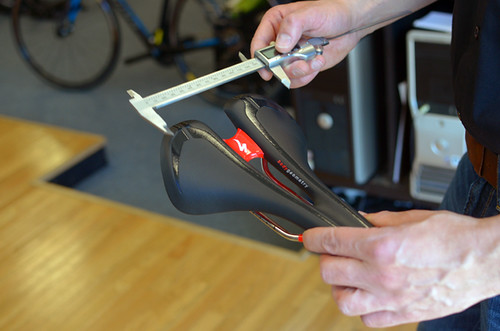
According to the fit chart, the saddle width recommended for my sit bones was 155mm minimum. My Berthoud saddle (which is flat) measures 160mm across, and my Selle Anatomica (which is rounded) measures 170mm across. My comfort with both makes sense according to this fit method.
Next, Joel asked what I liked and disliked about the saddles I normally use. I explained that my saddles are fairly wide across the rear, yet have narrow, racing-style noses. The wide rear and narrow nose combination works for me, because this waymy butt feels fully supported but I don't get thigh-rub. Other saddles I've tried tend to be either too narrow or too wide all around, which doesn't work. I also like the feel of suspended leather, compared to other surfaces I've tried.
As far as what I don't like, that is a little trickier to explain. The Berthoud feels a bit too hard, whereas the Selle Anatomica has a bit too much give. And with each, I occasionally - at random times, it seems - feel pressure or pinching in the middle of my "soft tissue." It happens rarely now compared to the problems I used to have, but it does still happen occasionally. We discussed all this in detail, as well as the other saddles I've tried. I described my dislike of gel (I sink into it and feel horrible pressure), my inability to ride Terry saddles (the slots are somehow in the wrong place), and finding the edges of many racing saddles "too sharp" as I pedal.
After taking all of this in, Joel suggested I try the Romin Evo saddle by Specialized (interesting write-up about it here). It had everything I seemed to need: a rounded wide rear (168mm across), a narrow nose, and a firm, but not rock-hard, surface. A channel down the middle and a curved nose were designed to avoid contact with exactly the pressure-prone spots I'd identified. It is not a woman-specific saddle, but then neither are my own. A synthetic saddle made by a big-name manufacturer, it was not what I would normally gravitate toward, but I'd said I would be open minded, and so I would.
The Romin Evo is now fitted on the demo bikeI'm riding. I could not feel it under me on the initial 30 mile ride, but I will withhold judgment until after the follow-up, 100K ride.
But whether this particular saddle wins me over is beside the point. What I appreciated the most was the generally informative conversation with the fitter - who I felt was neutral and knowledgeable when it came to various styles, materials, aesthetics and brands of saddles. I would like to keep learning myself, and at some point to post a comprehensive guide that might be of help to those at a loss for where to start.


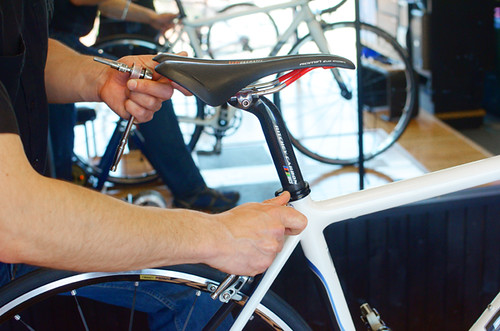
 When getting a bicycle, whether new or vintage, it can be nice to personalise it - to make alterations here and there, so that the bike feels distinctly "ours". I am often asked for advice regarding various aspects of this process, from budget, to component choices, to colour coordination. And while these things are highly personal, there are several general points that I propose keeping in mind.
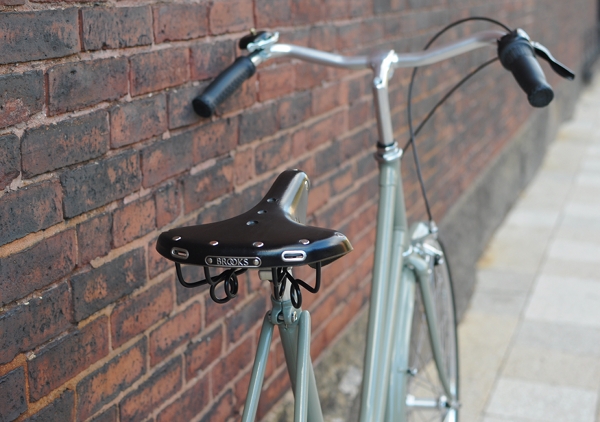 1. Address functionality and comfort before looks. Prior to buying colourful panniers and covering the bike with flower garlands, make sure the saddle position and handlebar height are properly adjusted for your proportions and postural preference. You may be surprised how much just that factor alone can change the "personality" of the bicycle. And this, in turn, will better inform subsequent aesthetic choices.
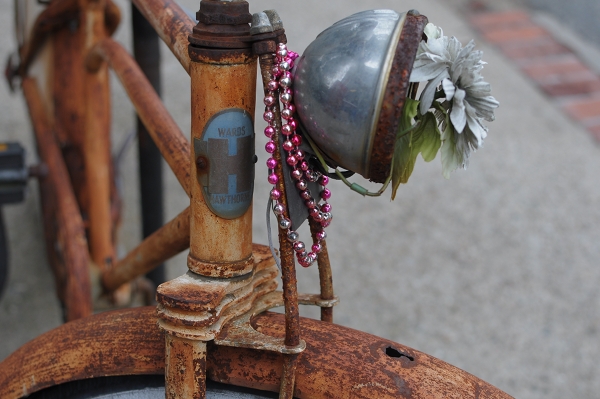
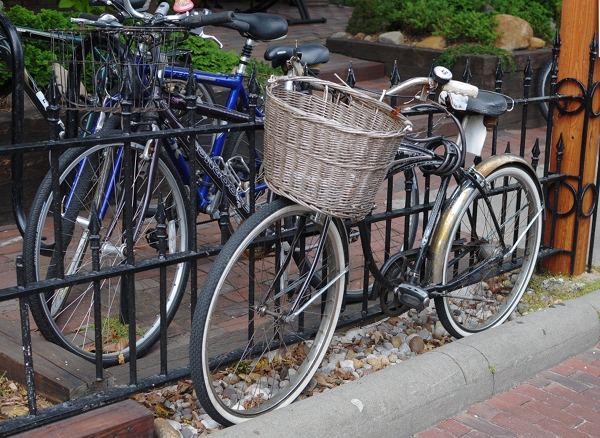
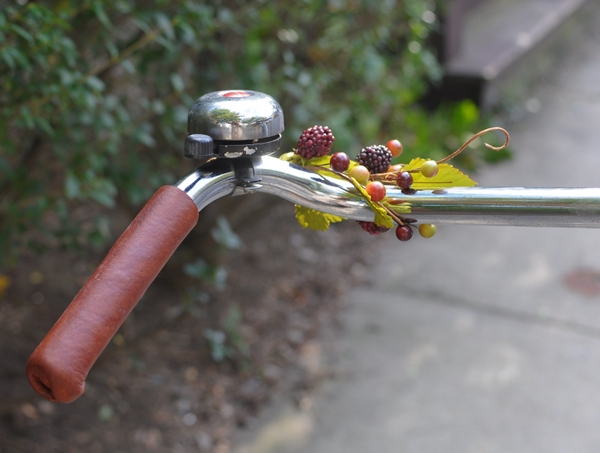 2. Personalising the looks of your bicycle need not involve buying lots of costly accessories. Some of the most delightful decorations are also the least expensive. Consider that things like ribbon,faux florals,twine, and stickers can cost mere pocket change. A simple bow in your favourite colour on the handlebars, or some flowers along the edge of your basket, will create an instant, lively transformation. And if you have an old bicycle with scratched up paint? You could turn it into a "zebra bike", "tiger bike", or "bumble bee bike" by wrapping appropriately coloured electrical tape around the frame to create stripes.
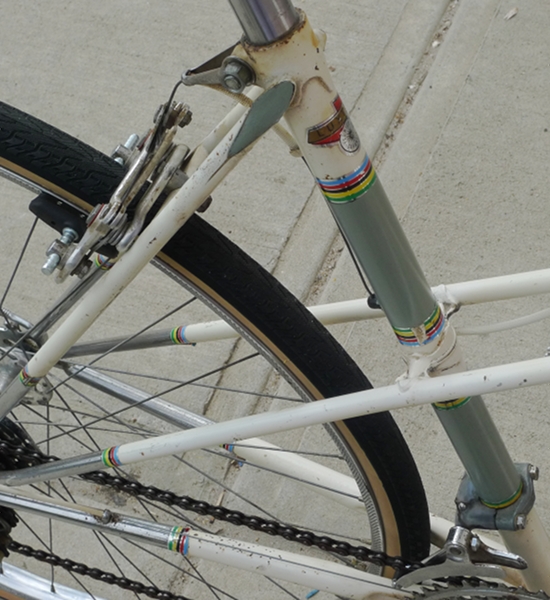 Of course, with an older bicycle there is also the option of using paint. You could trylug outlining, hand-painting small panels, or even paintingyour own designs along the entire frame. In Europe I see bicycles hand-painted with flowers, polka-dots, zebra stripes, peace symbols, lady bugs, and all sorts of other simple motifs.A paint pen for lug outlining will set you back around $2. Enamel paint will cost around $6 for a small can.
 3. Avoid formulaic accessorising. If you saw it in a magazine or on a popular blog, chances are that so did hundreds of others. Do you really want to spend all that money on limited edition saddles, deluxe grips and exotic tires, just to end up with a bicycle that looks identical to lots of other bikes? Take the time to consider what combination of things would suit you individually, rather than trying to recreate a popular look.
 In the end, the bicycles that are the most striking and feel the most "yours" are those that reflect your personality - regardless of the budget that went into achieving that.


 The La Sal Mountains in the distance.
 They called this one Broken Arch because there is a crack running down the middle, just to the left and above where the man is standing.
 This huge rock formation reminded me of the statues of lions guarding the gates, but these seem to have lost their heads! The trail was fun. Easy in some places and not quite so easy in others, with a bit of scrambling over rocks and squeezing through several tight spots.
 These arches were on a short offshoot from the main trail. This was as close as I got, that trail went no further. It would have been interesting, I think, to walk through and in them.
 We paid extra for these level of trail grooming?
 Skiers tracks in the woods
 Happier now the snow is falling.


 Sarah Foster Parkison is my 3rd great grandmother. Born on May 14, 1818 in Perry County, Ohio she was the daughter of Benjamin Foster and Margaret "Peggy" Myers. Sarah's brother, Eli, was born December 28, 1819. I don't know for sure when their mother died, but on September 27, 1821 their father married Peggy's sister, Anna Maria "Mary" Myers. Benjamin and Mary Foster had eleven children between the years 1822 and 1843.
 GEORGE T. PARKISON / DIED JUNE 27, 1902 / AGED 81 Y. 10 M. 15 D. / SARAH - WIFE OF G. T. PARKISON / DIED APR. 24, 1904 / AGED 85 Y. 11 M. 10 D.
 BENJAMIN F. / Son of / G. T. & S. PARKISON / DIED / Apr. 27, 1873. / AGED 19 Ys. 11 M. 15 D.
 Adam two clips up on "...Crowbar"
 Steen cleaning the anchor on "Crowbar" with McClellan Butte backdrop.


 My cousin's place overlooks a tidal river with a view out into the bay. Beautiful! (Yeah, that word again!) I'll be here a few more days but will be busy having some fun and "catching up" with my cousin (at least 15 years since we've seen each other) so don't know if I'll get anything more posted anytime soon or not. But eventually, I will. Not doing a whole lot of genealogy research either right now - just enjoying myself and Mother Nature.